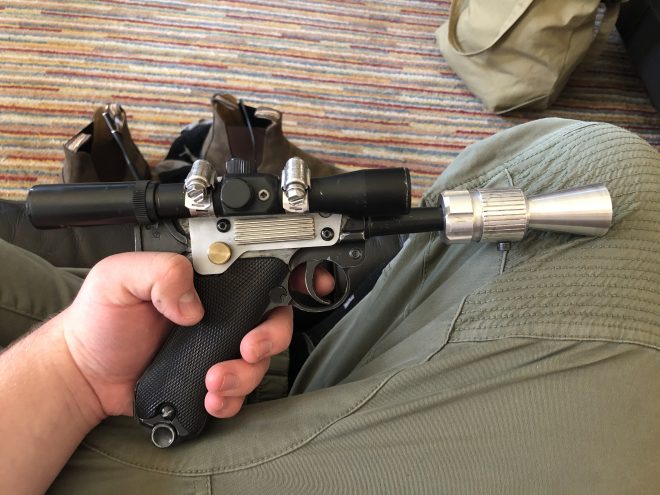
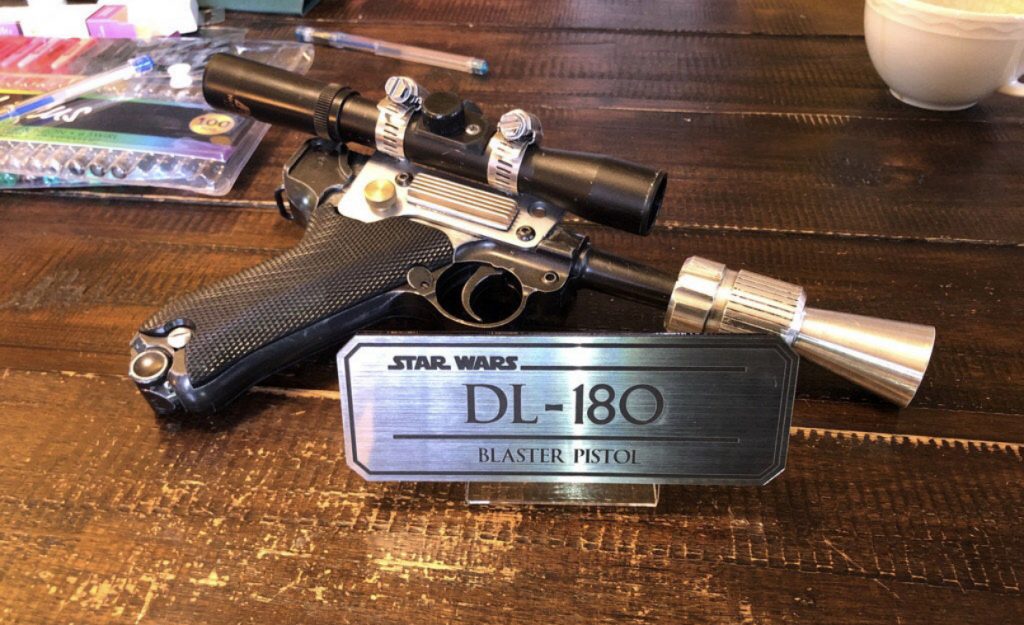
My custom blaster pistol, the DL-180
The props and costumes from the original Star Wars in 1977 are the most iconic physical item ever seen on screen. There is no debate, there is no “technically”, there is no “but”. They have stood the test of time and have transcended the idea of props and costume made for film. 43 years after the first sightings of Darth Vader, Luke Skywalker’s first lightsaber, R2-D2, and the Millennium Falcon, you can still walk into any store selling toys and purchase representations of those original props and costumes seen on screen. No other property has achieved that status. Just like everybody else, I want a lightsaber of my own, I want a droid of my own, I want a spaceship of my own. And fans have done just that through things like the R2 Builders Club, the various premium lightsaber companies like Saberforge, Kyberlinght, and Vader’s Vault, and much more.
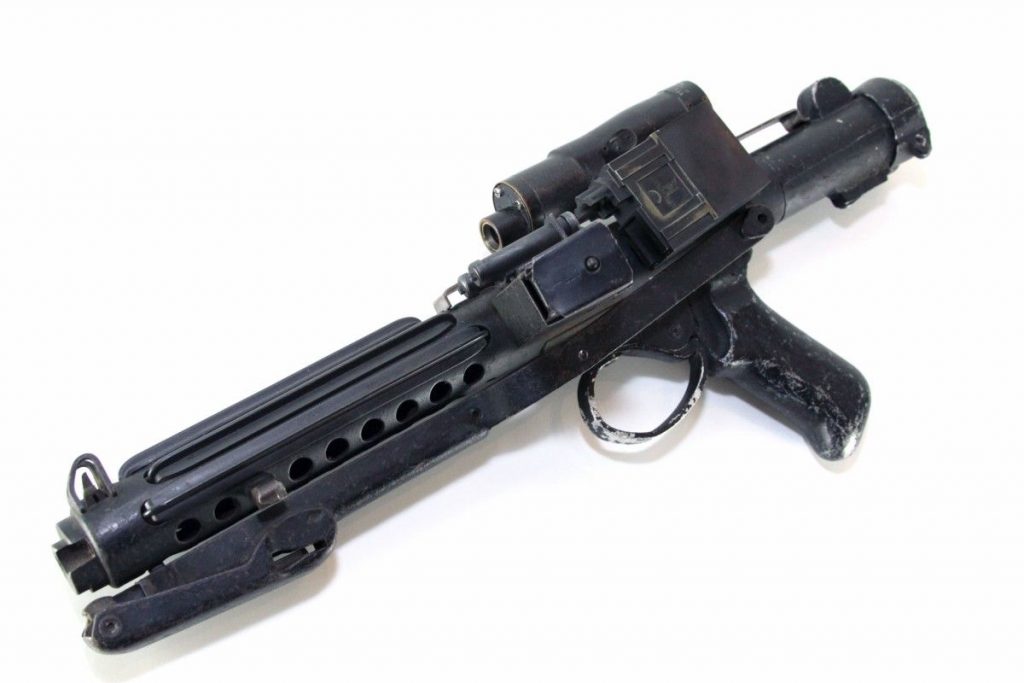
Fans have done the same with blasters, getting every single detail down to an absurd amount of accuracy, which is an art form in of its self. But to me, I’ve always seen it differently. When you hear the stories on the creation of these classic props, you hear about how slapped together everything was and how the people had NO idea what this movie was going to be, and that’s what I love. The budget was small, the idea was strange, and expectations were high. The budget meant the props department ended up renting large cases of old guns from World War 2 films made in the UK and dressing them up to look like space guns from this weird universe George Lucas had created.
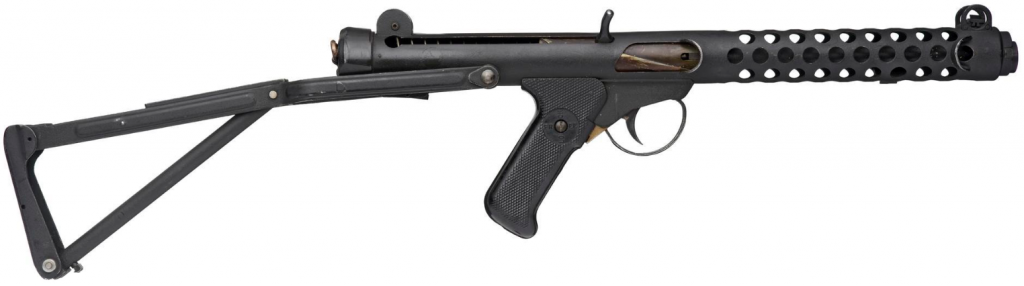
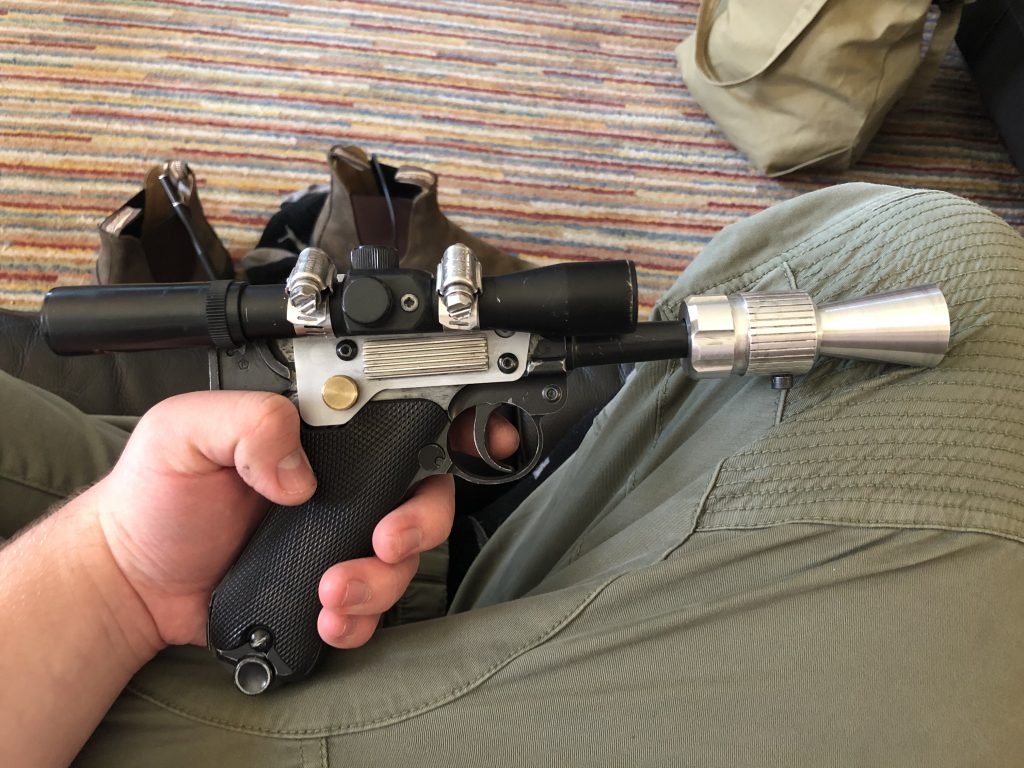
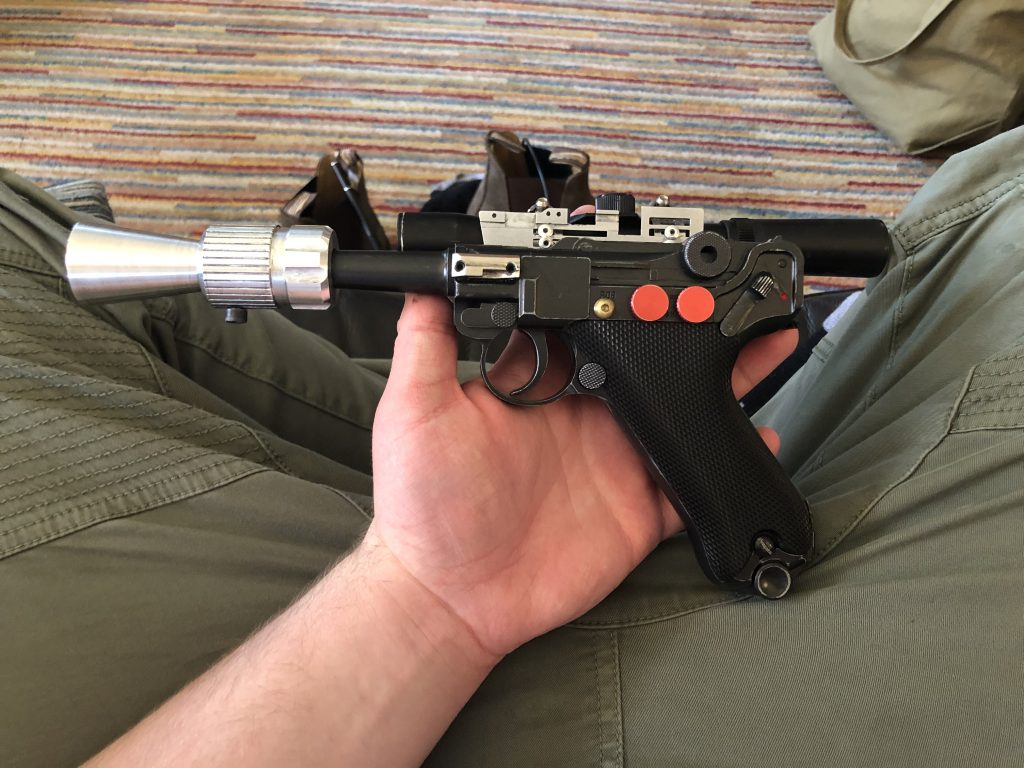
All the additions had to be removable to make sure they could be returned in prime condition back to the place they rented them from, and this mentality was carried over to a lot of props seen in the film, which is the aspect I chose to carry over into my build. I wanted my blaster to be able to be fully disassembled, to be made entirely out of real metal, to be an accurate weight to the ones on screen, and to feel like it could have been taken straight off of a film set from 1977. To start, I looked primarily at my two favorite blasters from the saga, Han Solo’s hero DL-44 from Star Wars (1977) and Jyn Erso’s A-180 from Rogue One (2016) for inspiration.
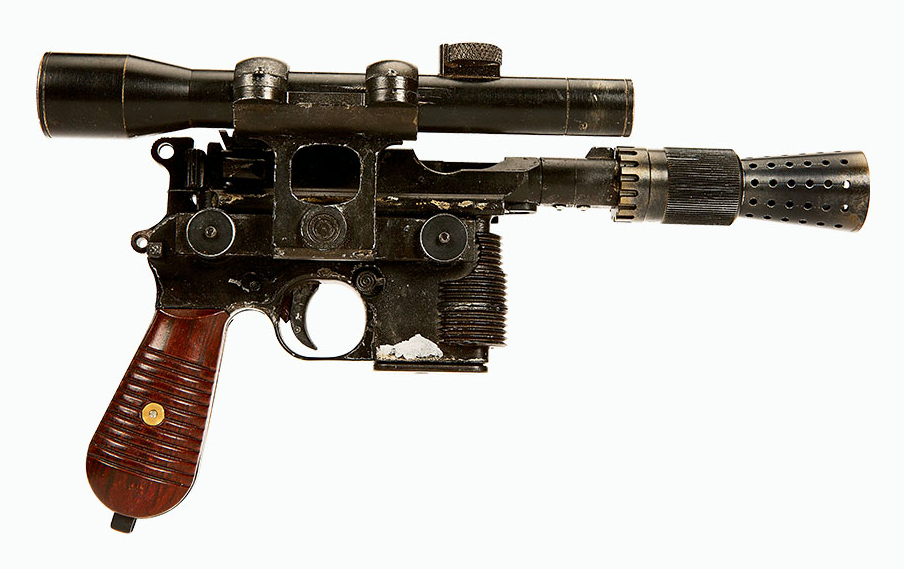
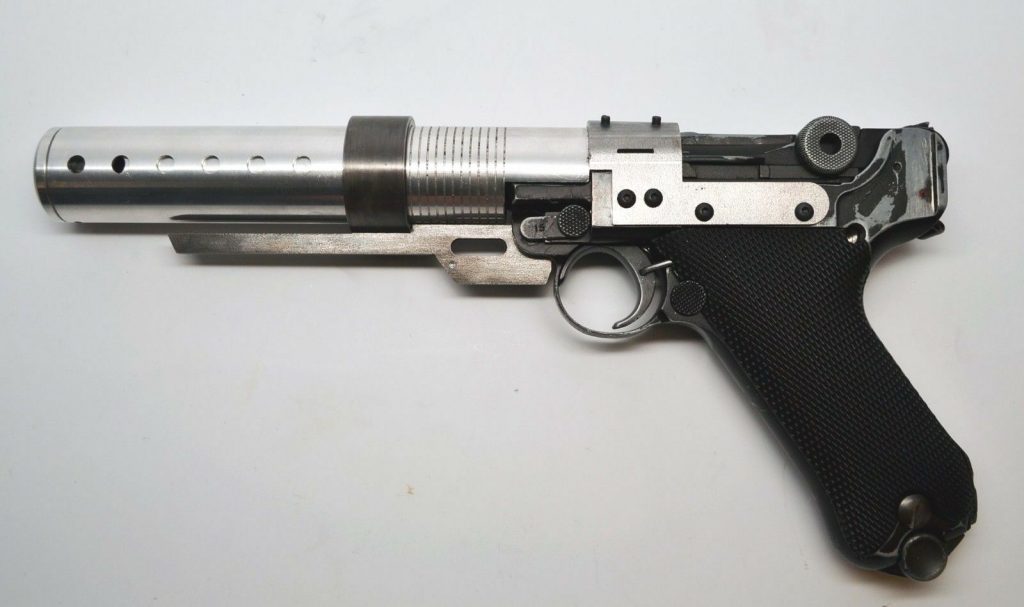
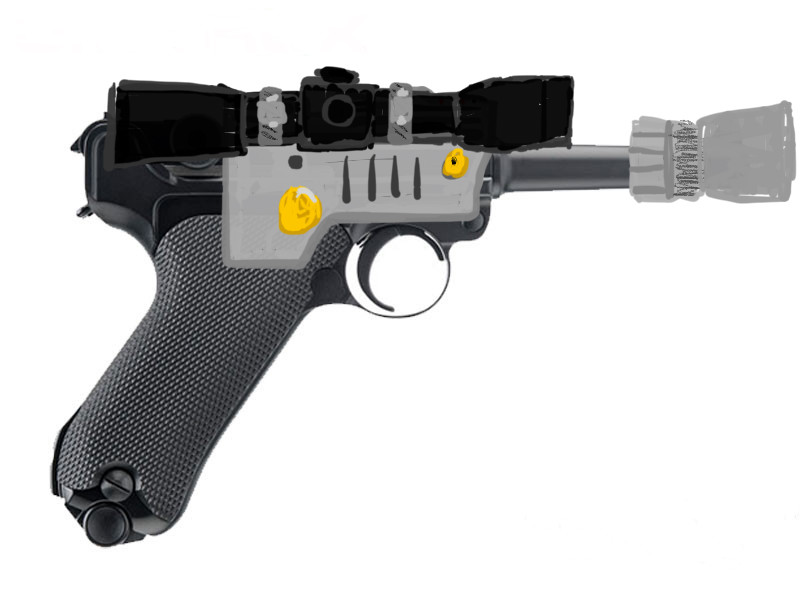
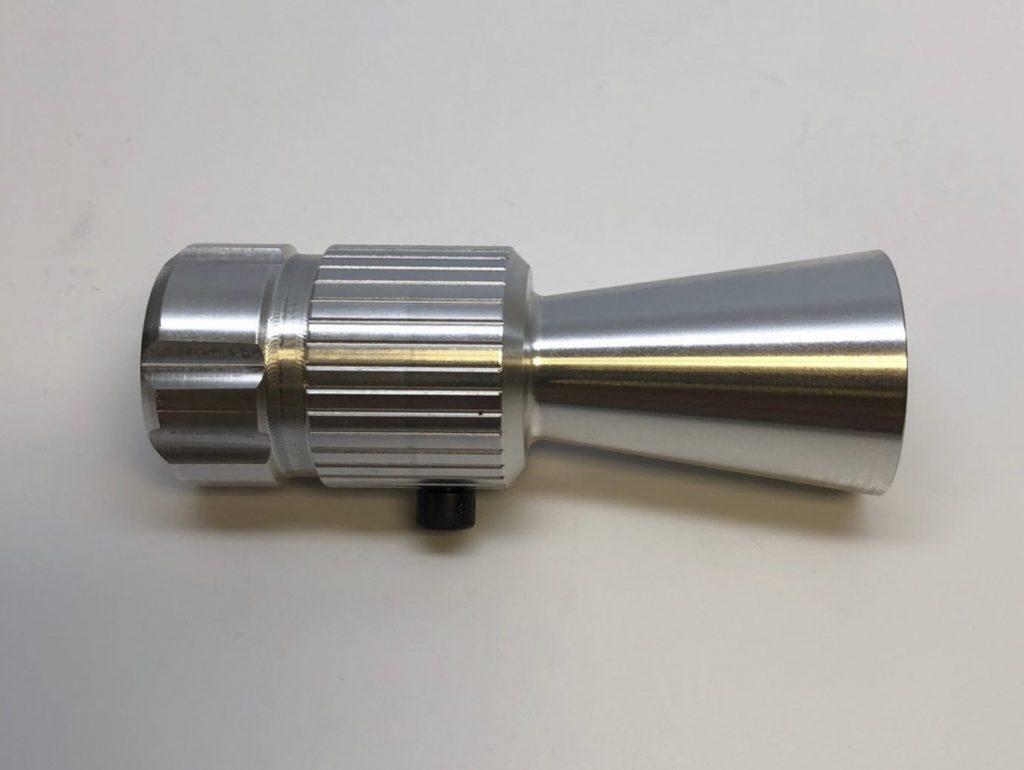
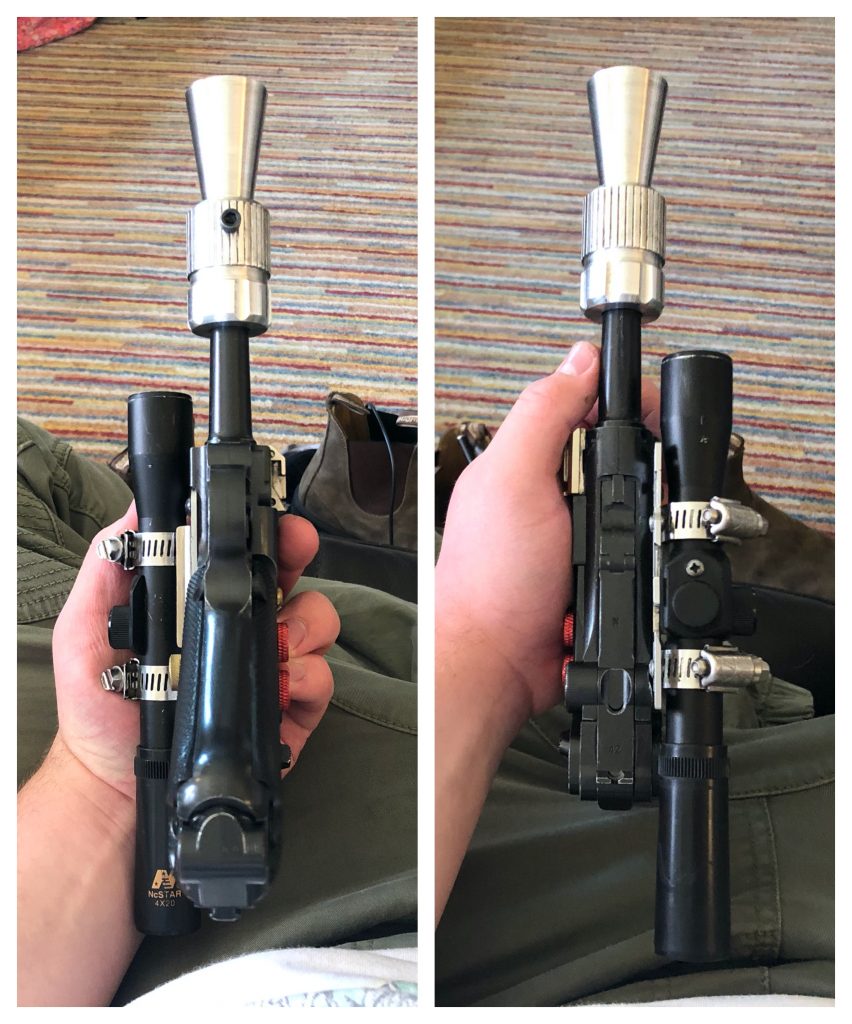
I tried to take the aspects I liked from both blasters and to combine them into a blaster that incorporated my favorite elements of the props. In the end I chose to use the A-180 pistol base, that being the P.08 Luger, with major elements form the DL-44, like the scope and Flash Hider, (The big silver cone at the front, taken from the barrel of a German plane used in World War 2.) with a few of my own added elements to spice it up. I made a TERRIBLE mock up drawing to make sure my idea was clear, and started to work.

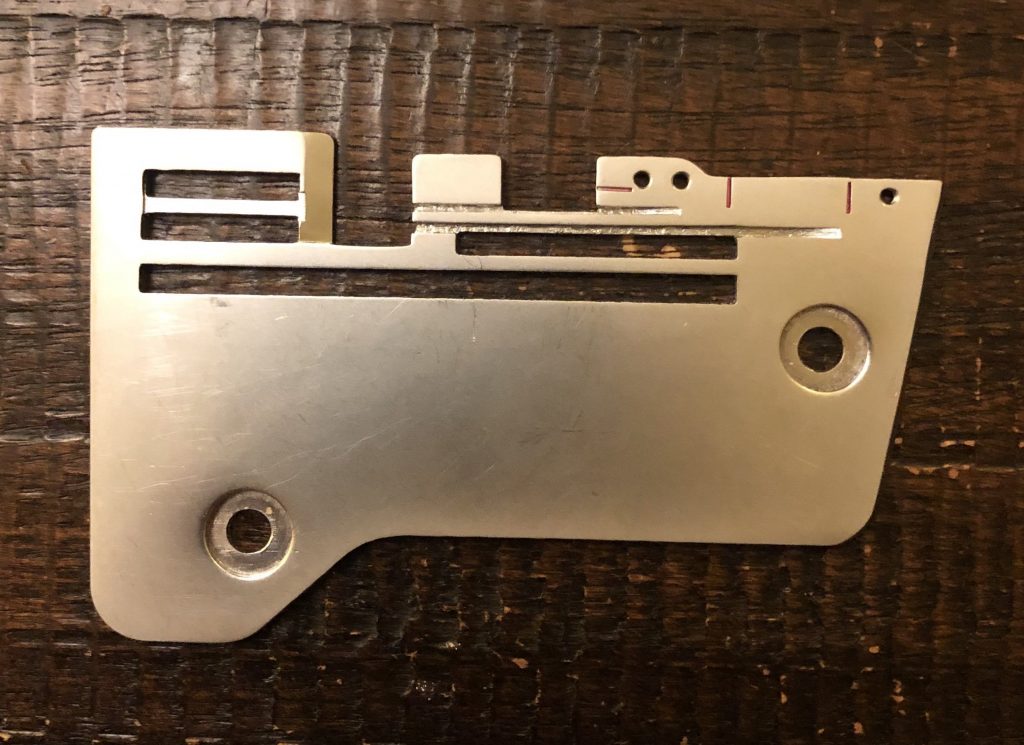
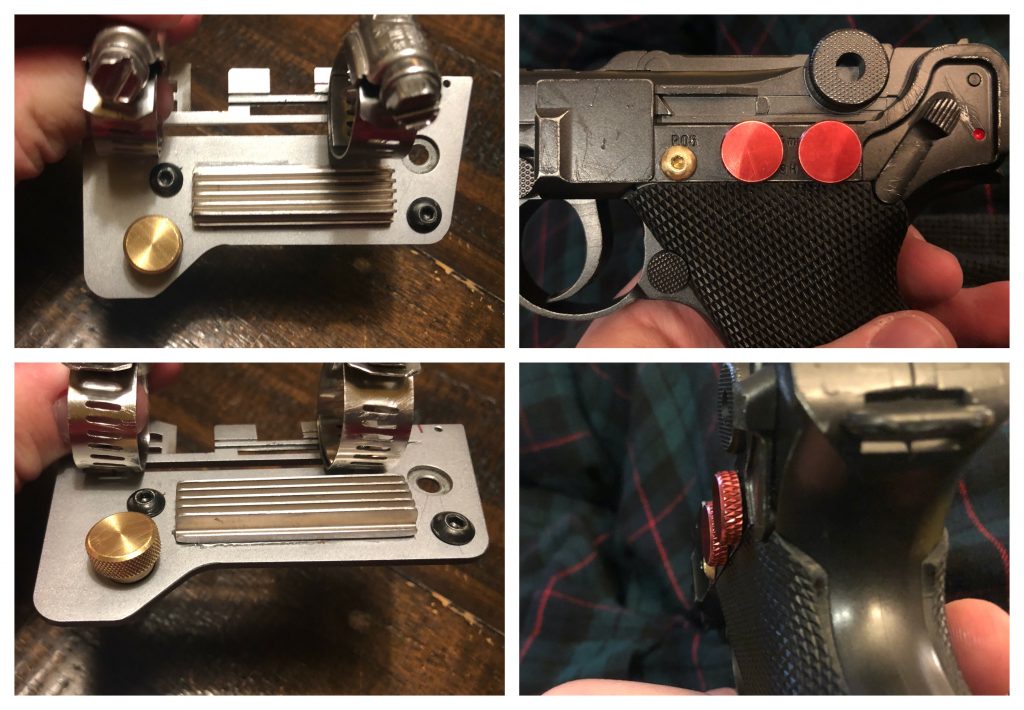
The design started around a serger needle plate given to me by my costuming teacher at my high school after a part of it broke and the part had no use left. I instantly knew that was my scope mount. Found parts are a staple of Star Wars prop and costume design, and this was the perfect place to start, with a unique form factor, as strong design, and a nice matte sheen to it.
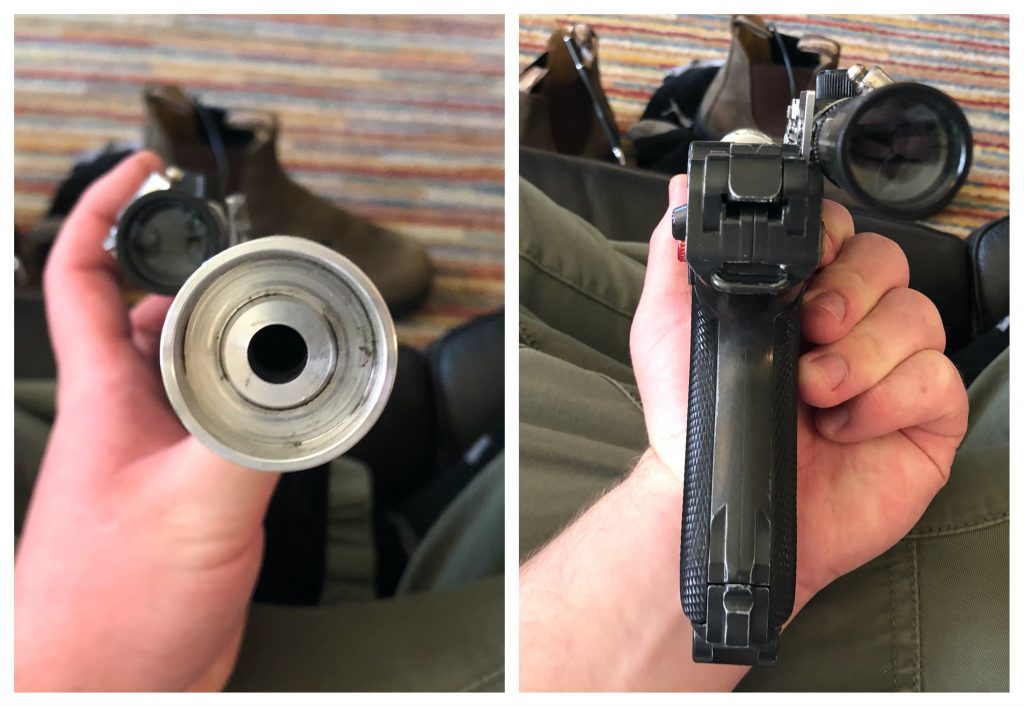
The scope itself was much more of a style of a substance ordeal as the blaster wouldn’t fire, and so I went for a cheaper BB gun scope that had a more simplified form factor and looked the part of an updated blaster pistol scope within the Star Wars universe. I used a pair of hose clamps and pop rivets to secure the scope to the scope mount making the scope removable and making it fit within the universe. When my dad first saw the hose clamps, he was confused as they had a myriad of technical text on them written in English, and asked why I chose not to remove them. I would typically hate this kind of thing as it would break the rules of the Star Wars universe, but this was my way of honoring the original props. The makers marks and technical jargon was not able to be removed as it would ruin the guns they had rented, so they were forced to keep them, but in my opinion, it adds something to it. I drilled a few extra holes into the plate to add screws in later, just to make absolutely sure it wouldn’t go anywhere.
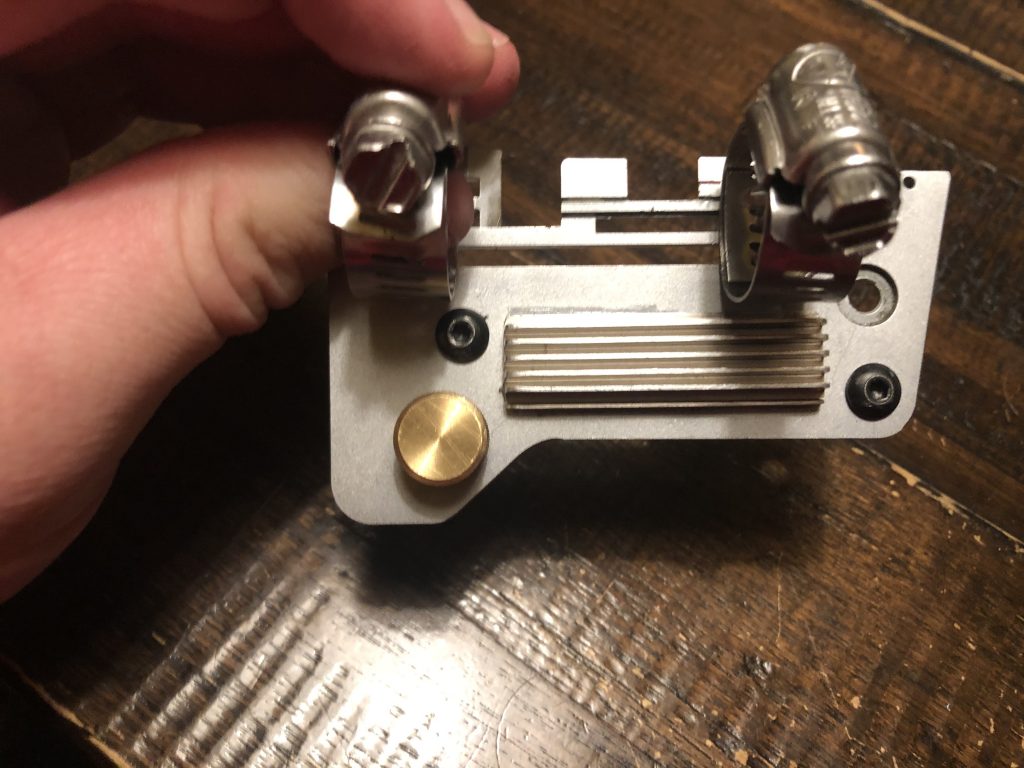
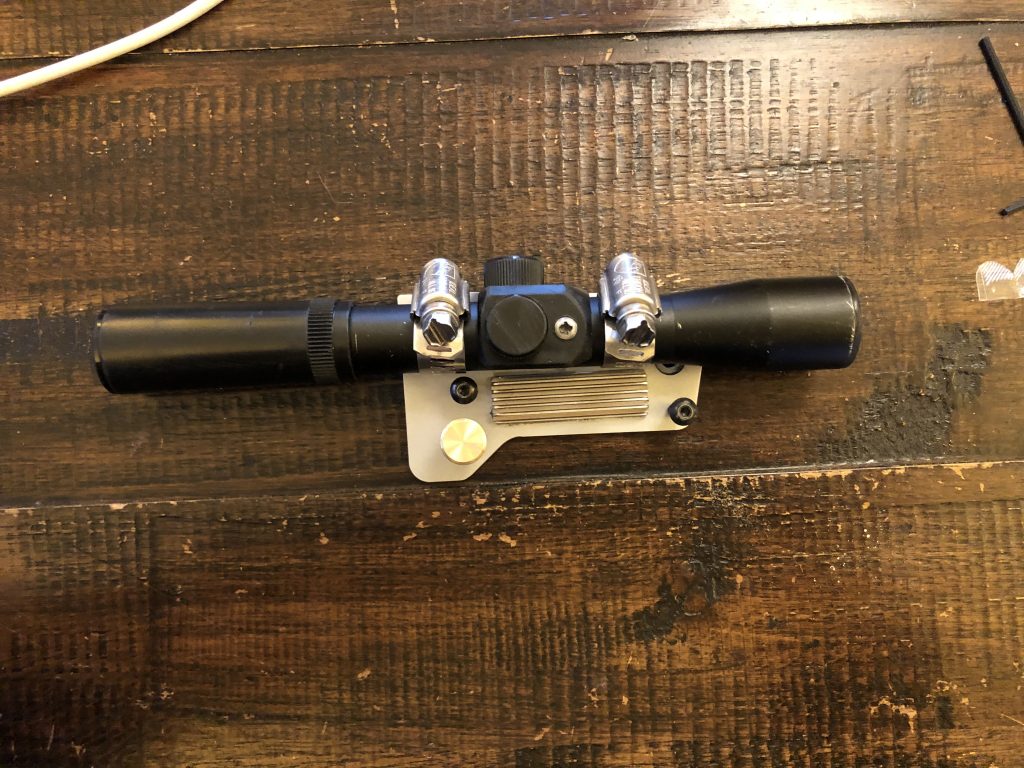
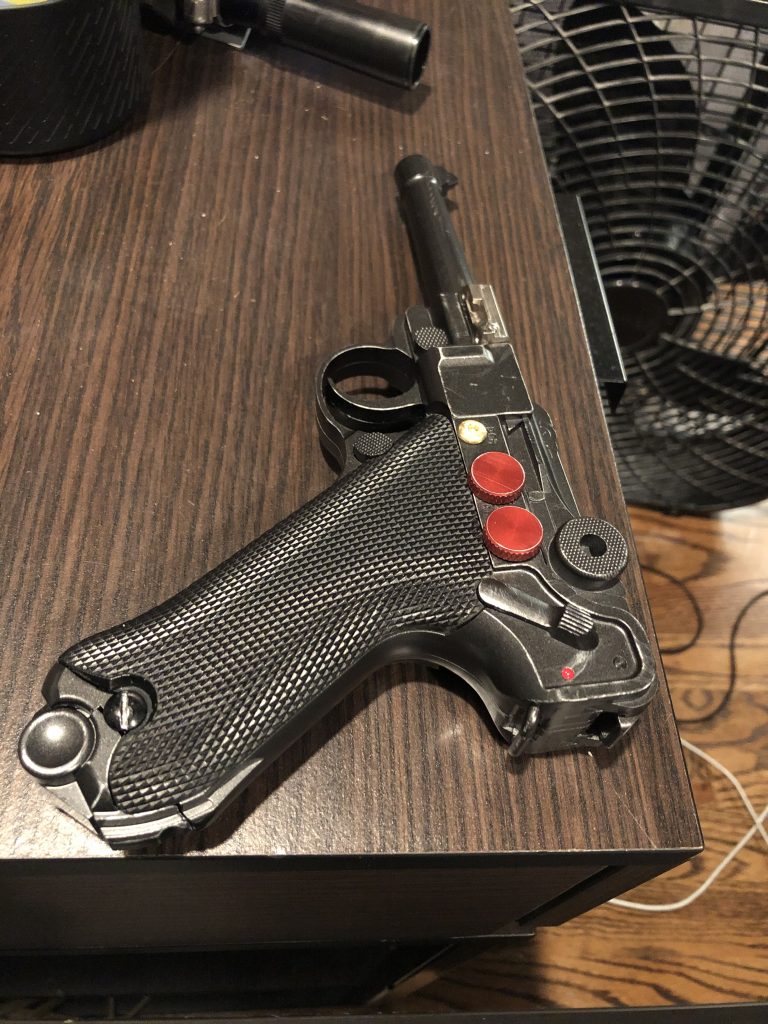
For the small details throughout the blaster, I used a variety of knurled screws to call back to the brass knob on the scope of Han’s DL-44 and to Darth Mauls lightsaber in The Phantom Menace (1999). I also used a couple parts from the heat sink of a Mac PowerBook G4 on the base of the scope mount and at the front of the main body to call back to both the silver chunky bits on the A-180 and the heat sink seen on the front of the DL-44. For the main P.08 Luger body of the blaster, I used an airsoft replica of the gun and modified it. This included drilling and tapping holes for screws, grinding away large amounts of metal to make the scope mount sit flush with the body, and of corse, weathering it. This can all be seen in detail in my making of video shown at the bottom of the screen.
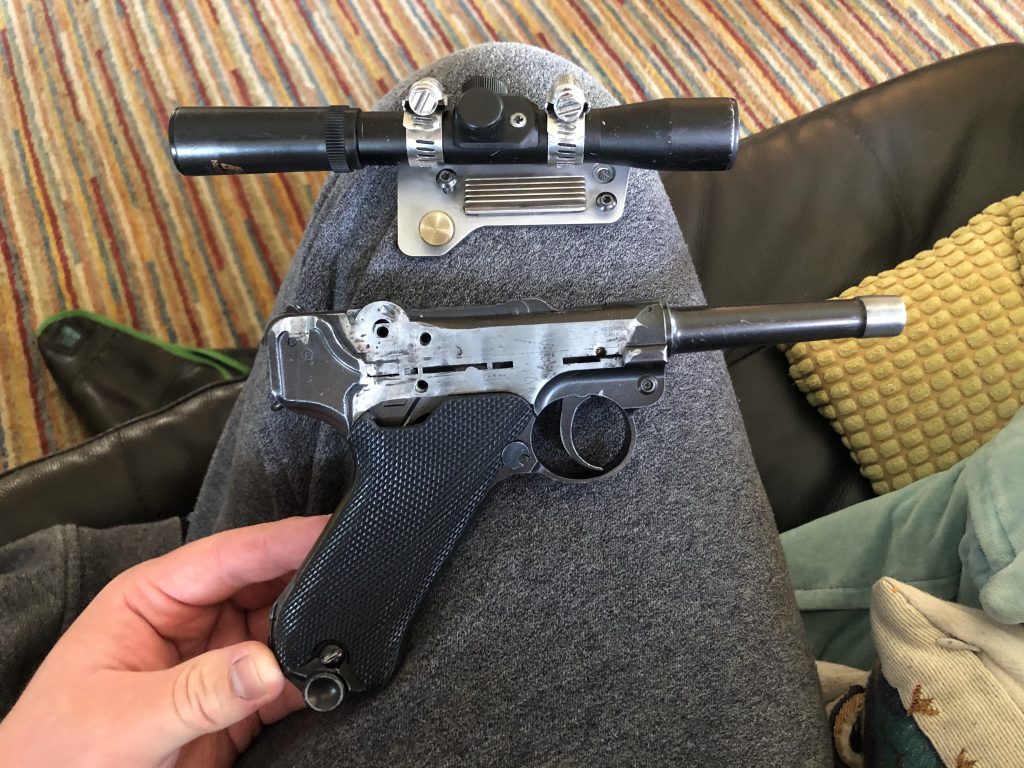
And finally, the one piece made specifically for a Star Wars blaster, the flash hider. This one was hard. I found MANY people all over the internet selling these parts in various shapes, sizes, and materials, but I wanted something specific. The most iconic version of this part is the one seen in the original prop, with a total of 36 holes (I believe) drilled in the cone section, and distinctive lines, curves, and shapes, that make it so memorable. I was trying to both make it clear that this was the same kind of part in universe and also make it distinct from the one used in the original blaster. It also had to be somewhat easily removable, fully made of metal, and fit the rest of the blaster well, which I thought would make the search EXTREMELY hard, but actually proved to be relatively easy. Fellow Star Wars fans have made such an extensive and well organized library of information available to everyone that made it extremely easy to find the exact part I was looking for. There were many different versions of the blaster used throughout the saga, and the one that I chose to use was from a deleted scene from Return of the Jedi where Han and the other rebels storm the Imperial base to shut down the shield generator protecting the second Death Star. I really liked the look of the part, it had a nice simple and slightly more futuristic look than the original part that complimented the scope very well. After a little black wash and some dents and dings, it added a whole lot of character to the overall prop.
With that, the blaster was complete.

This prop is one that just worked. I couldn’t find any accurate measurements for any of the parts I didn’t already have, and a LOT of the completed product case from guessing and luck. A whole lot of luck. Looking back, it’s almost unbelievable that it became this final product. I am really proud of how this project turned out and every time I pick it up I’m always astounded that I made it. I made this to be compatible with my full cosplay outfit I wore to Galaxy’s Edge at Disneyland, but I obviously can’t take it to the park, for obvious reasons. but I love this prop and I have NO regrets.
Thanks for reading this, I appreciate it! If you want to see me make this prop with help from my Dad and some funny moments, I suggest you watch this video. it turned out great and I’m really proud of it. Hope you enjoy!
Replica Prop Forum Article with complete parts list and links: https://www.therpf.com/forums/threads/custom-star-wars-blaster-the-dl-180.330175/