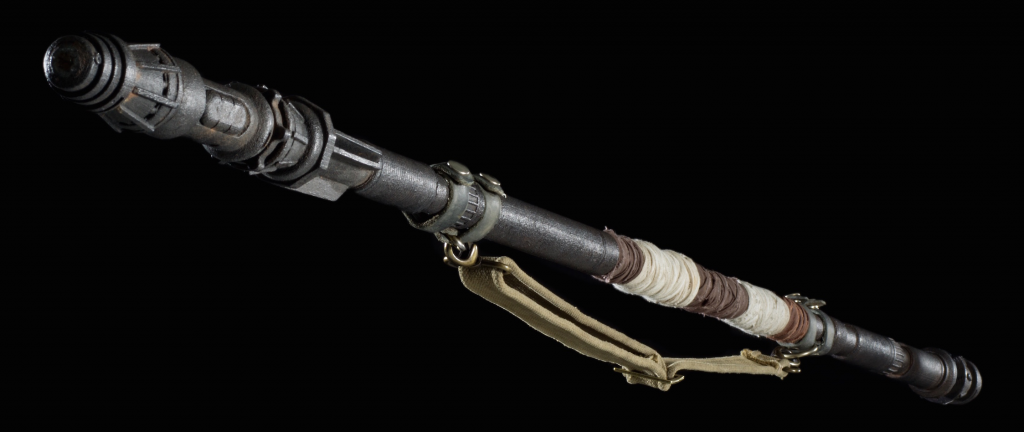
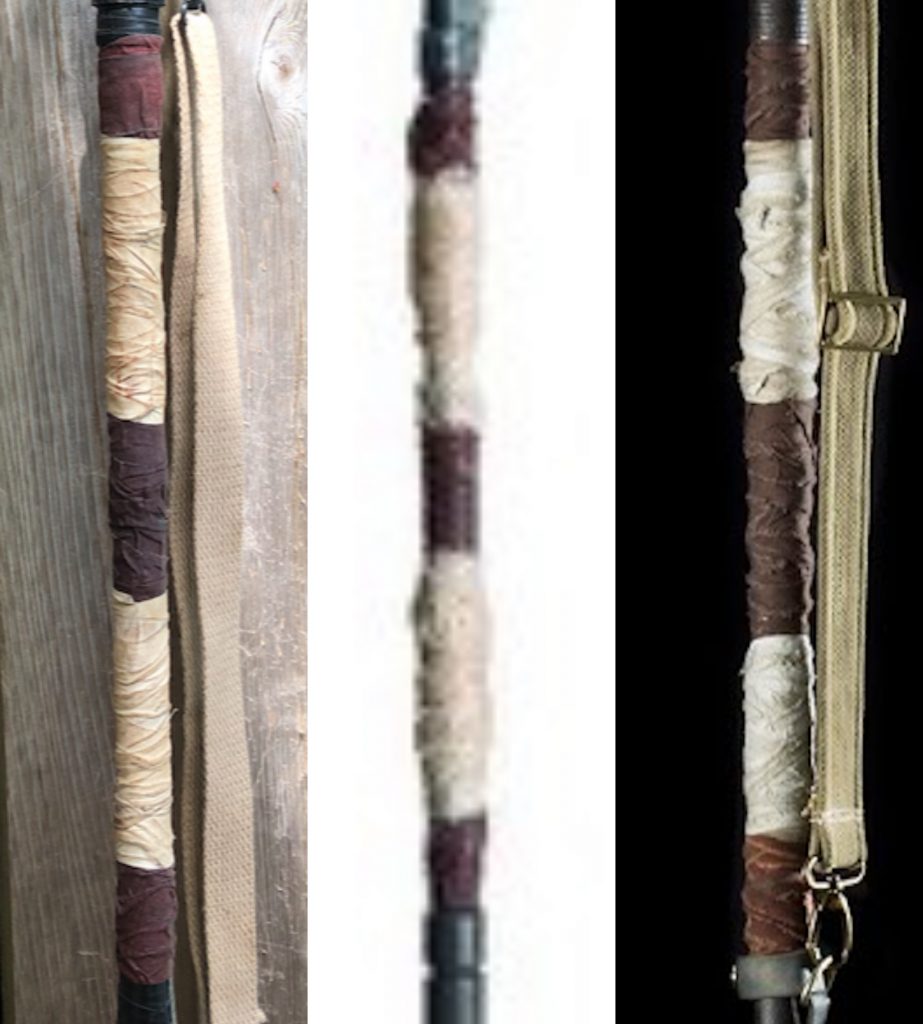
In the summer of 2016, after the release of The Force Awakens, I was back into Star Wars. And props. My friends Liam and Jacob had been making backyard movies and I was often with them, it was a really fun time. Liam had been working on a lot of really great props in his dad’s garage workshop that got me back not my, “I need it and it doesn’t exist/is to expensive, so I have to make it” phase, and I’m EXTREMELY glad it did. If I hadn’t had been where I was at that time, I probably wouldn’t be here typing this right now, and I wouldn’t have the clear goal I do now of making props and costumes for Star Wars. Anyways, me and Liam also saw The Force Awakens in theaters on opening weekend and had a blast, and I also saw an advanced screening earlier on Thursday night, and got to go to school the next day and say I didn’t like it. (Even though I kind of knew I did in the back of my head, but now its probably in my top 3 favorites.) One prop that always stuck with me was Rey’s staff. It was EXACTLY what updated Star Wars should look like to me. The harsh edges, the indents and grooves, the length and weight, and most of all, those hand wraps a little above the half way point.

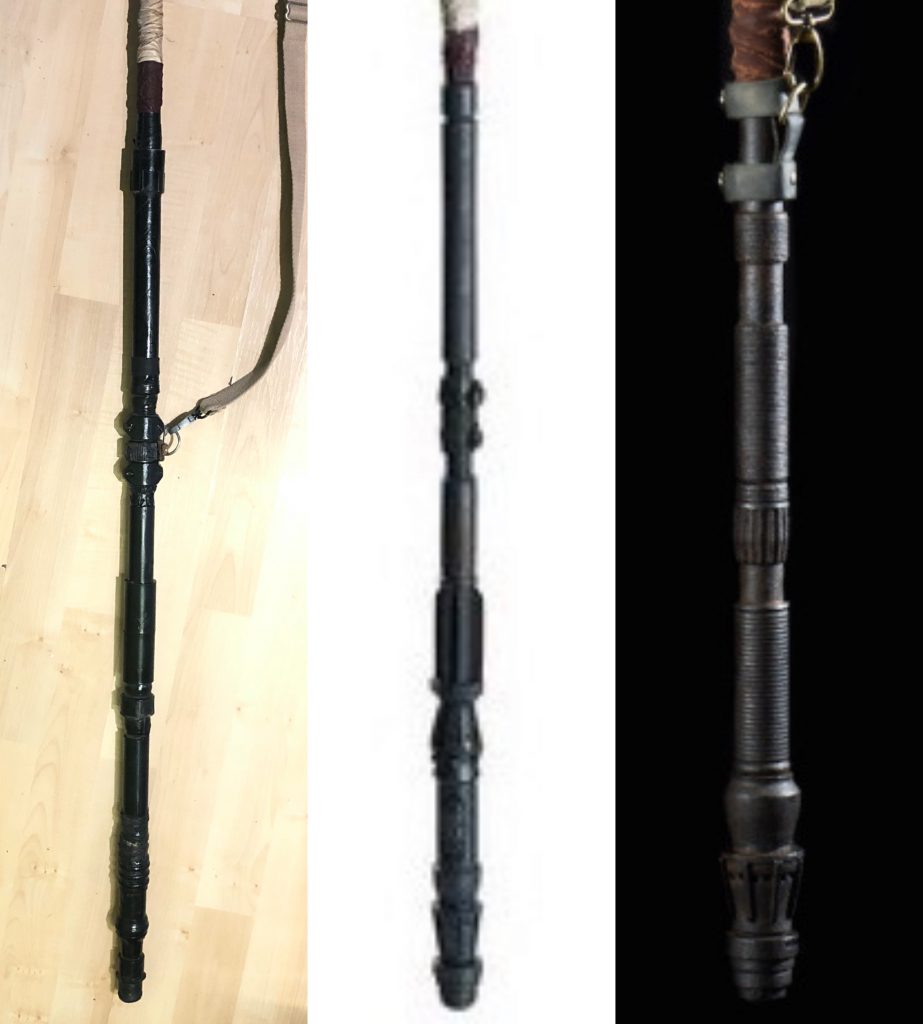
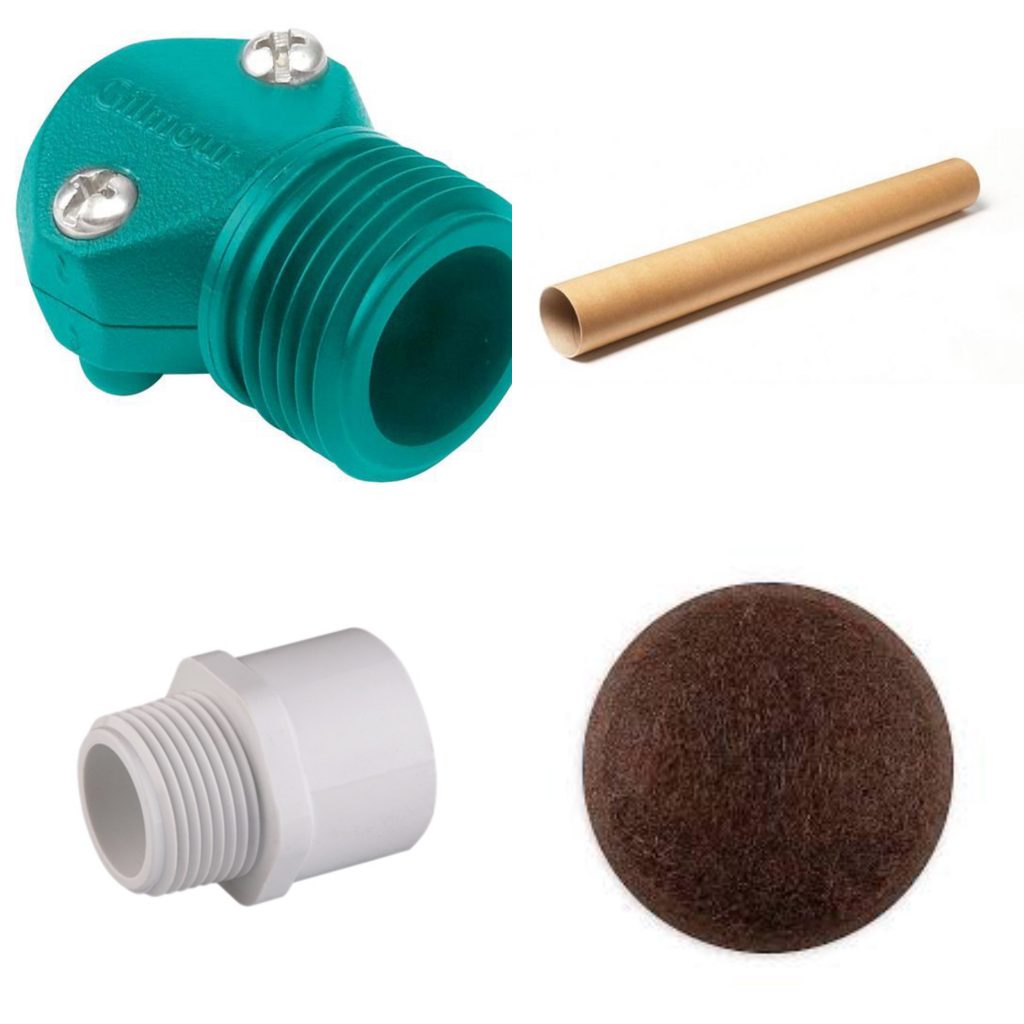
Now, since we had $0 for a budget, this build isn’t accurate. By any real means. But it FEELS like it to me. It has that feeling of a broken rogue design that drew me to the prop in the first place, ad just like I say about all the props and costumes seen in The Force Awakens on screen, it has this giddy energy of “Star Wars is back” that I really enjoy. To start, we began with an old heavy duty steel handle for a shop broom that had been broken. this was the core of the staff. We started adding various tube shaped pieces from around the ship to make up the different sections of the staff as best we could, but its obviously more of an approximation. For the top and bottom parts, we found an old old side walk chalk grip that loosely fit the form factor and began with that. We secured it with some sprat glue (as ell as that would secure…) and wrapped some hockey tape over it. For the next pieces, we used several PVC plumbing parts. In some areas on the staff we used PVC pipe over the metal core and connected the more complex PVC pieces to the pipe, adding the steps and grooves seen on the prop, which I think really brings it all together. Now, when we did this, we didn’t have good access to reference pictures. We only had pictures of the halloween costume accessory from way back in October before the movie came out, but now with better reference, you can see that there are a lot of things that are off. I do however still love this thing and am really happy with how it turned out.
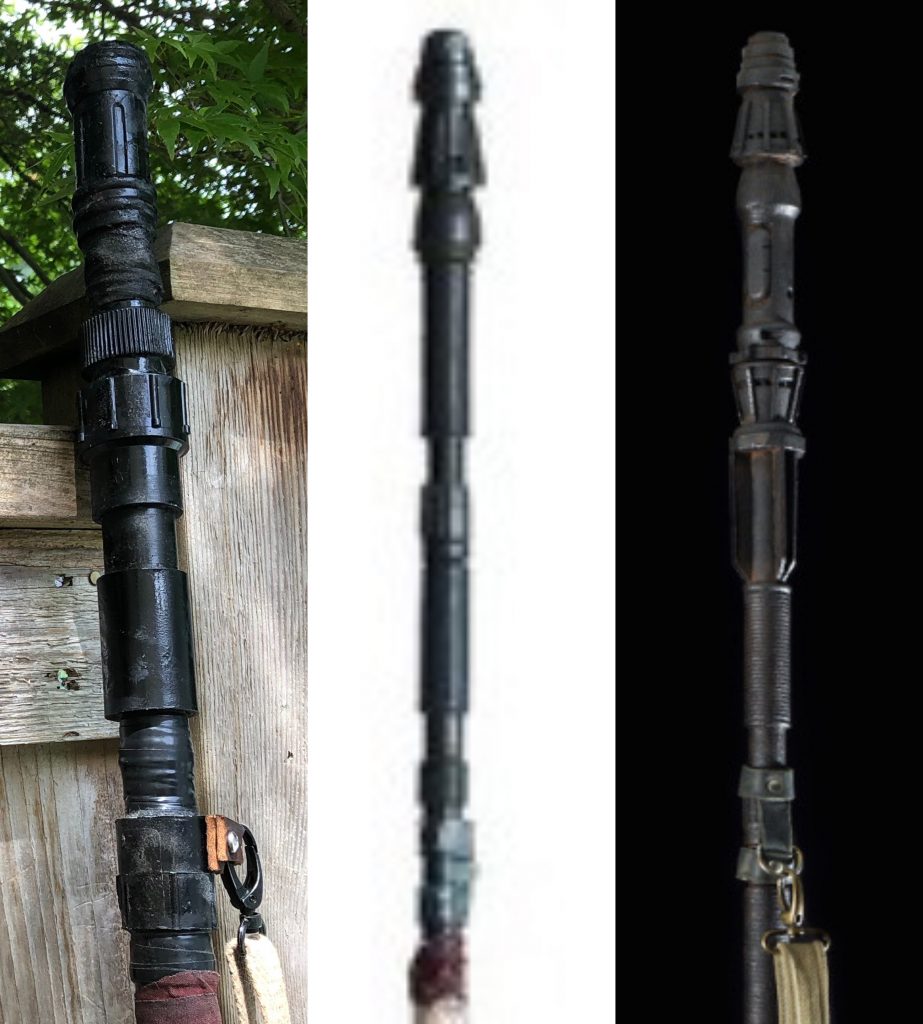
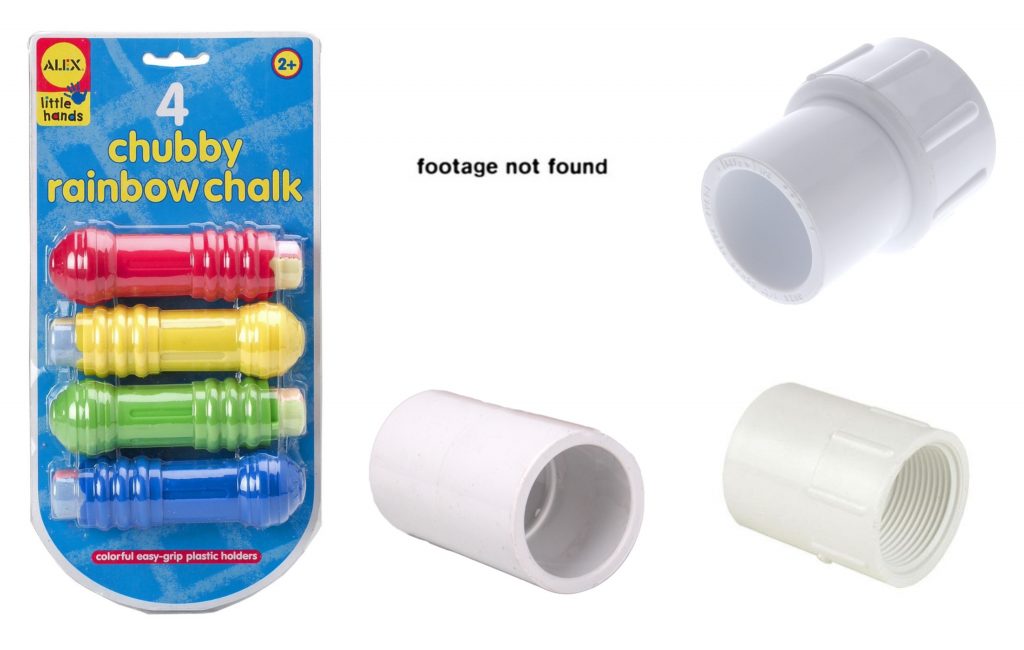
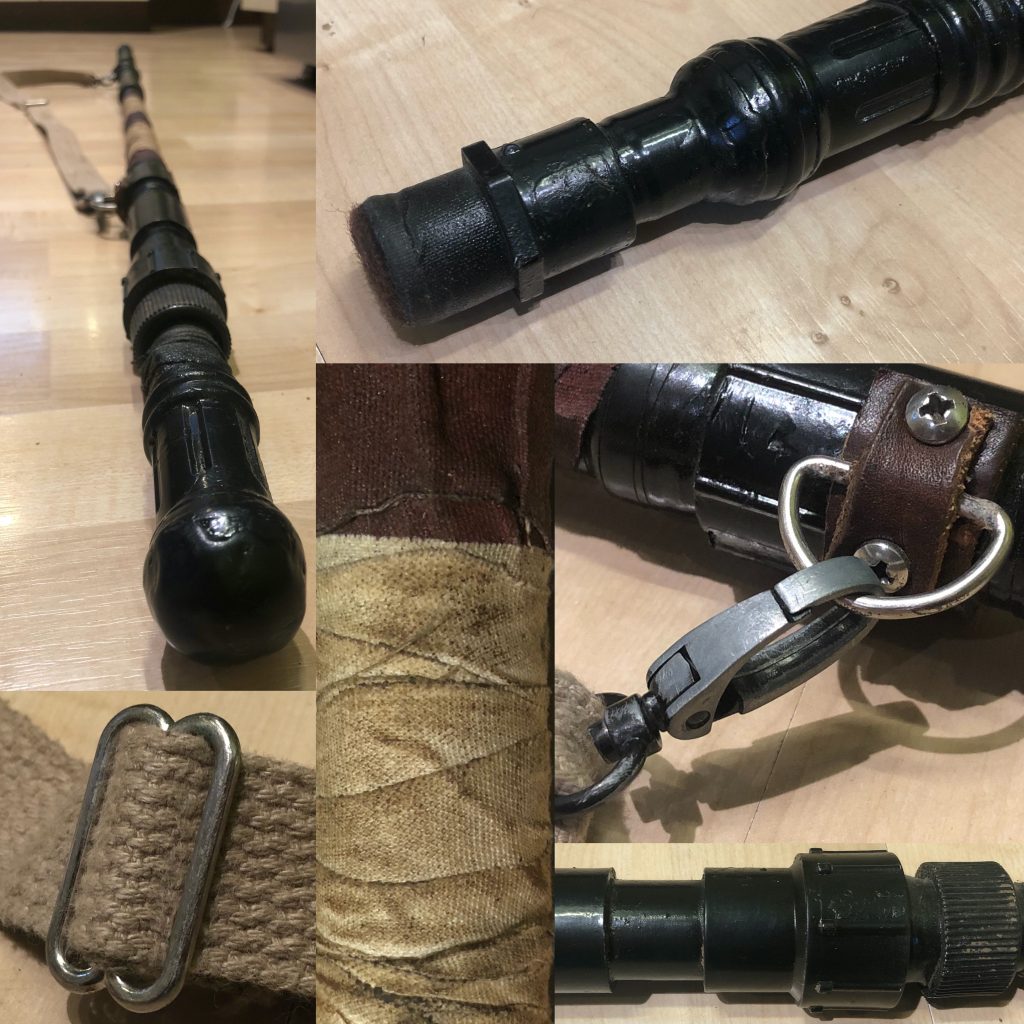
I’ll be discussing the shoulder strap, strap loops, and hand wraps later. It is a master class in risk, blood, and fire, and the perfect way to end this, so stay tuned. ANYWAY, we left some space for the hand wraps and proceeded to the lower staff area. Now, when we did this, we didn’t have good access to reference pictures. We only had pictures of the halloween costume accessory from October before the movie came out but now with better reference, you can see that there are a lot of things that are off. so the bottom is definitely off here. We also were starting to run out of room on the core, so we sanded down some PVC pipe that was almost the same size as the metal core and shoved it into the core. This did extend the length, but it definitely makes it more fragile, so I would probably swap the core the other way leaving the stiff metal core on the bottom. The pieces on the bottom half are a lot more simple and longer than the top. We started with another threaded coupler piece like we put on the other side of the hand wraps, then we put on a paper towel tube. Yep, you heard me right. It was the only thing we hand that was long enough and would fit the bill. Next, we used a couple of plastic hose nozzle clamps and another mystery corrugated piece in-between them. Then We then added another length of PVC pipe over the core, then two more standard couplet parts to make another length of space. To finish the end off, we put on a another chalk holder that was missing it’s bottom and put it over the core, then put on a hexagonal standard to threaded coupler on the bottom, and added a felt pad for floors.
Lastly, we get to the… shall we say, questionable stuff. So, when we made this, we were middle schoolers. I want to say I was more thoughtful than other kids my age, but if I’m being honest, when you’re with friends, it all goes out the widow. See, Liam thought it would be a cool idea to make the weathered brownish red color by spraying red paint on some hockey tape and then lighting it on fire. With a spray paint can. And so there we were, indoors, spray painting, and then we lit up a lighter, sprayed the paint through the flame, and created a home made flame thrower, which lit the strips aflame. Then it burned and turned brown and we said, “cool, how do we put it out.” We weren’t very smart kids at times. We franticly blew on the pieces and fumbled around desperately to find some way to put them out, and found an old rag that was able to do the job, and without ruining the pieces. The lesson here is, ALWAYS HAVE A PLAN. 1) It probably would have been fine if we didn’t use a spray paint can to light it as they are prone to exploding when interacting with fire like that, 2) We could have had a rag ready to begin with to put out the flames, 3) it was a bright sunny day, we could have taken it into his driveway to burn and to spray, as fumes and fire aren’t good indoors. And it’s good to make mistakes, cause I learned a lot from that experience and a lot of others involving Liam and Jacob. I really don’t regret that moment at all. But when you’re literally playing with fire, don’t avoid it, just have an idea of what you’re doing.
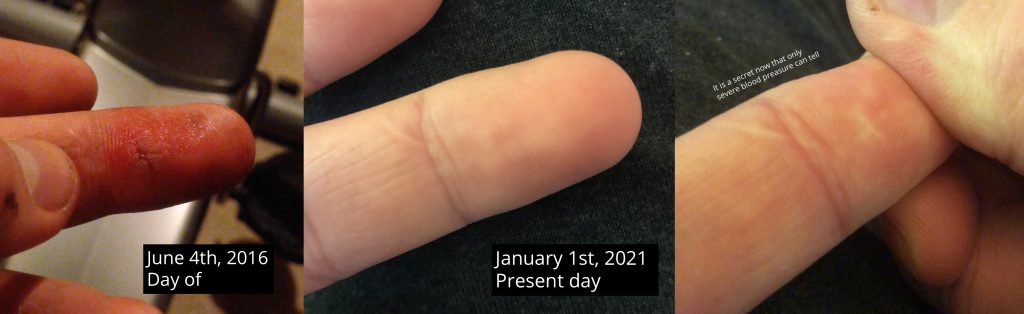
And now, the final piece. The strap loops. This did cause damage. So, after spray painting the thing black, we waited a few hours and decided to start on the leather parts that hold the sling on the staff. There were no reference pictures we could find at all relating to this part, and so we did kind of wing it. We chose an old brown leather belt and chopped it up to make loops we could slide a strap onto, and were ready to drill holes into the staff and belt to get it ready. I suggested a clamp, pilot holes, then screws, as we just spent hours working on it, but Liam was just like, “Nah hold it steady, it’ll be fine.” I saw the whole thing right there of a screw going through my hand and our staff breaking, and he started to drill. But what do you know it went… ok? i was still nervous, but it didn’t help my car e that nothing went wrong. we then did the other side of that one, then boded to the top. I was starting to feel ok wish about it and then whomp. A Philips head drill bit smacks into the middle finger of my left hand. Right on the tip of my finger, and it’s DEEP. and bleeding a lot. I got a band aid, and then another after 20 minuets, then another. I went through 3 band aids. My finger was almost white. But luckily we did finish the thing, and I obviously didn’t care too much, it was nice that we both learned a lot with that one too. I still have that scar today, actually.
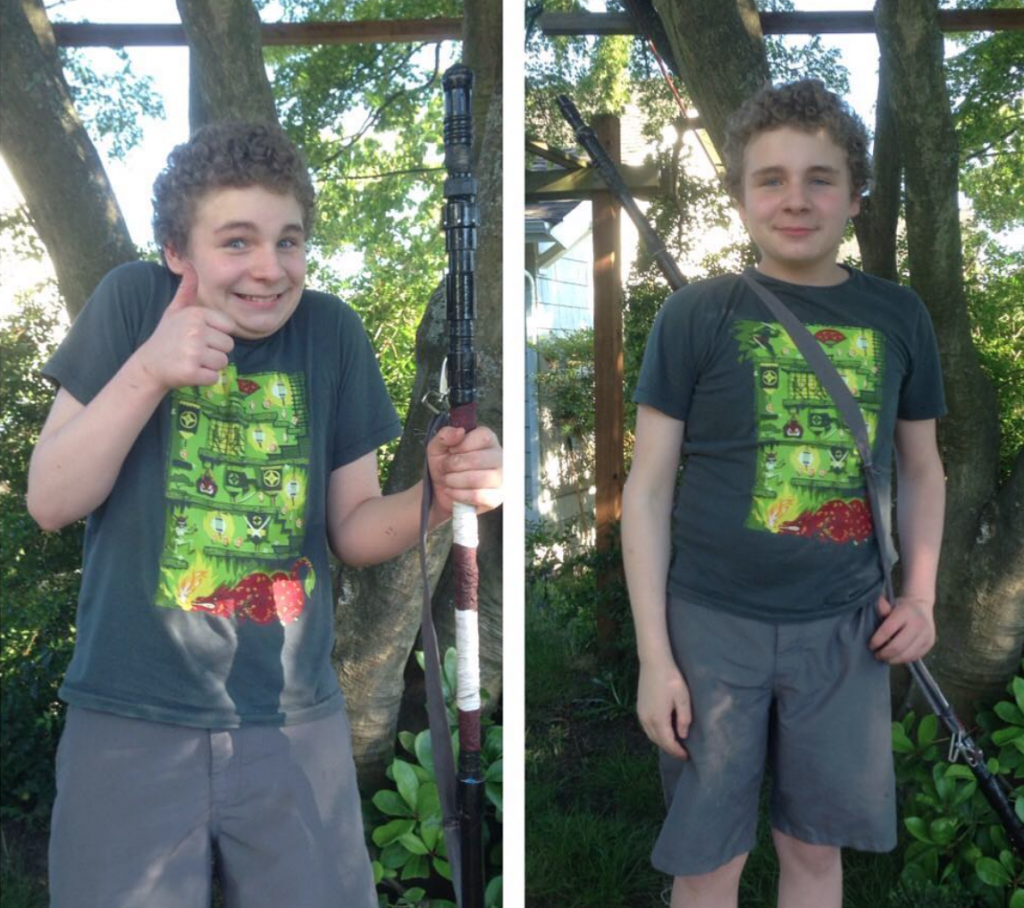
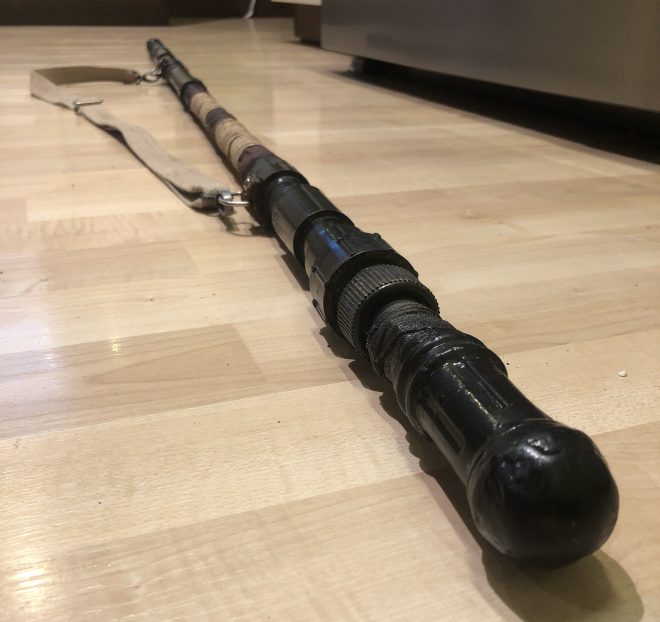
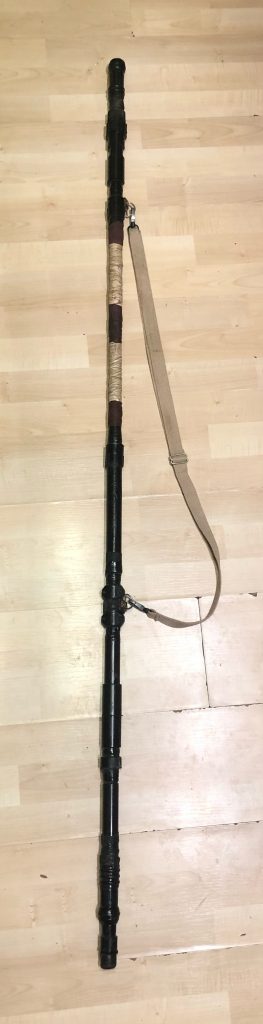
Over the years, I have made small, small fixes to it. I haven’t replaced parts or made any major modifications, but I did fix some paint issues, fill in some cracks in plastic parts, and add some D rings in the leather loop for the shoulder strap to make it easier to adjust. I did replace the shoulder strap though. The original grey one was a last minuet addition with no reference photos, so I did make a new one out of some nice canvas scraping and recycled some small buckles to the end and a tri glide buckle to the center like the one on the screen used prop. Lastly, I did rub some dirt onto the whole thing to add some realism to it and keep the dimensionality of the prop as alive as possible. With that, here is the prop today:
I hope you all liked reading about how me and my friend built this and enjoyed hearing my stories about what I learned during the process. I hope you enjoyed all this and thank you!