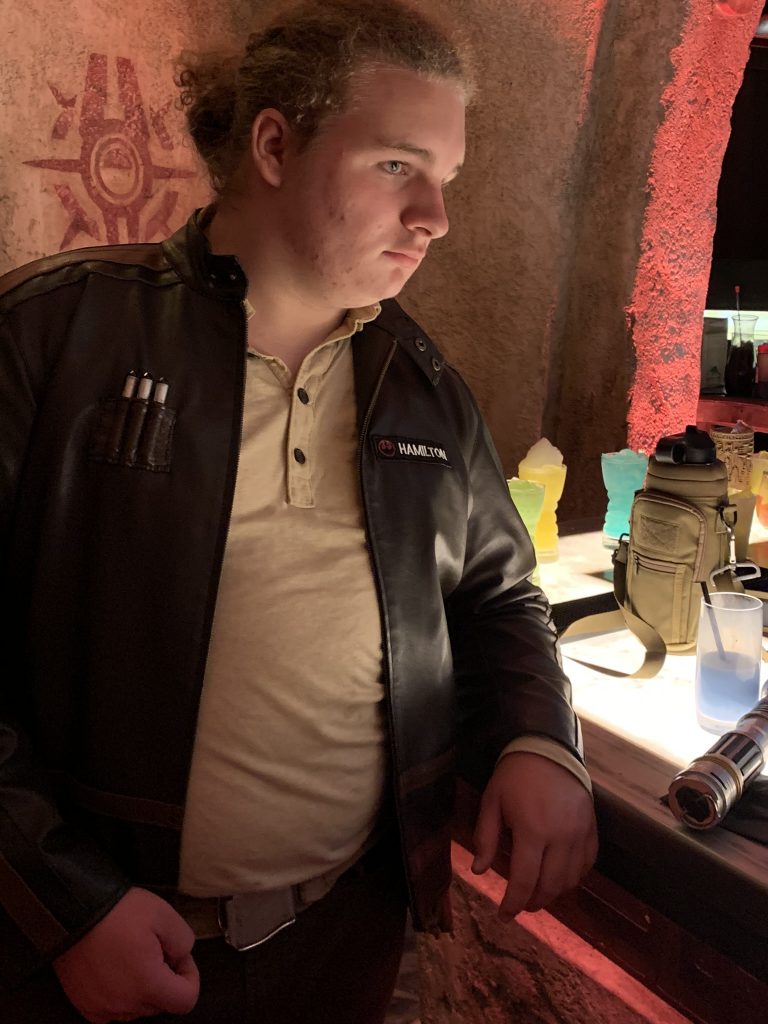
When I went to Galaxy’s Edge in summer of 2019, I went in costume. I assembled a thrifted indie cosplay, it worked great, and I had a good time. But as my skills have improved, I have been slowly improving and expanding on the outfit and props I imagined when I was on Batuu. (Honestly, it’s more like a full makeover, every costume piece is going to be upgraded accept the patches on the jacket) One of the original pieces of my cosplay was a set of tubes like you see on First Order and Imperial uniforms, as well on the X-Wing flight suits and Han Solo’s jacket in The Force Awakens.
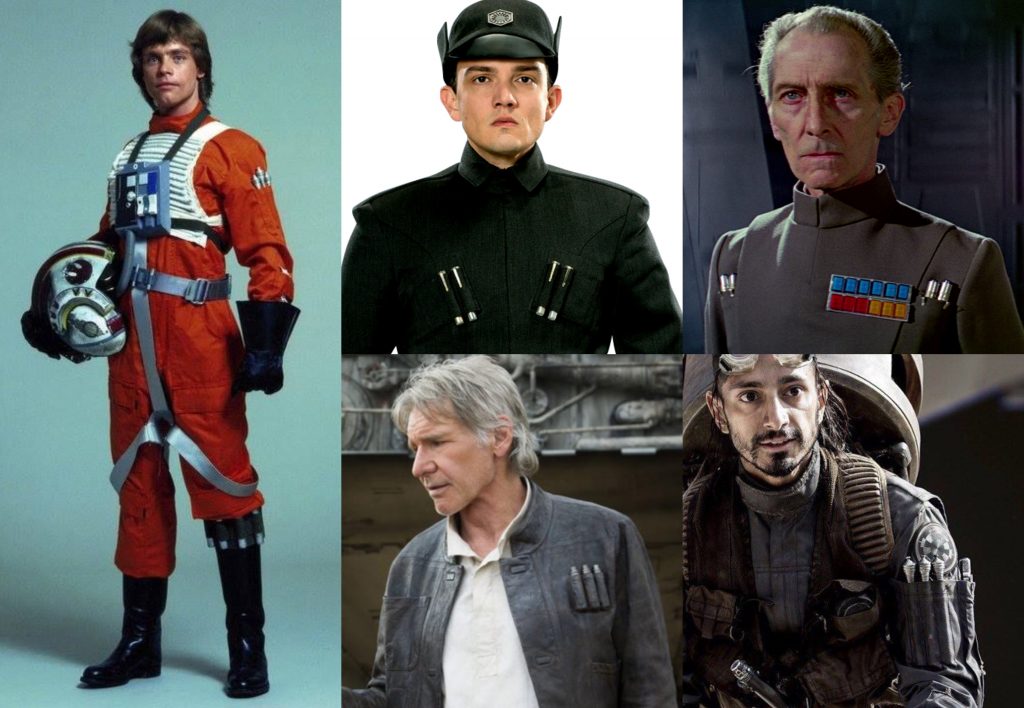
This part of Star Wars design has always been one of my favorites. It looks very unique and provides a different kind of dimensionality to the costumes you see on screen. I remember my first exposure to this piece of detail on Luke’s X-Wing suit when I was little. I had a glow in the dark book that walked through the original trilogy, and it featured a wide shot of Luke in A New Hope standing on the ladder to his X-Wing, with the tubes on his leg reflecting the flash of the camera. I was always so confused and was like, “What is Luke doing with all those Sharpies?”

But after doing some research, here’s the answer: the tubes all have different functions. Luke’s flight uniform has the tubes on the legs which are flares, and the tubes on the arms which are used for technical interfacing, also seen on Bodhi Rook’s uniform. Han’s tubes are actually bomb detonators, which Chewie uses at the end of The Force Awakens to blow a hole in the planetary shield generator. (Funnily enough, when Han gives Chewie the detonator, we never see him remove it from his jacket, and later on, we see he still has all the tubes on his jacket. Oops.) And lastly, the Imperial and First Order officers’ tubes are code cylinders, which originally implied some kind of data storage device, but Star Wars: Rebels and more recently The Mandalorian season 2 showed us that they act more like security ID badges and keys than actual files and such.
Now that I’ve told you the secrets of Star Wars jacket tubes of all kinds, here’s my secret: I have NO IDEA, what mine do. I have a whole back story for my character. I have a name, a family history spanning through the prequels past the sequel trilogy, (Which you’ll never hear about because I’m shy about it) and I can explain every piece of gear I’ve made for this character to you and why it’s there. But with this, I found a crappy tripod at a local dollar store, and I thought, “huh, that looks pretty good” and then I brought it home, hacked it up, and hand stitched some pleather I had laying around to make this.
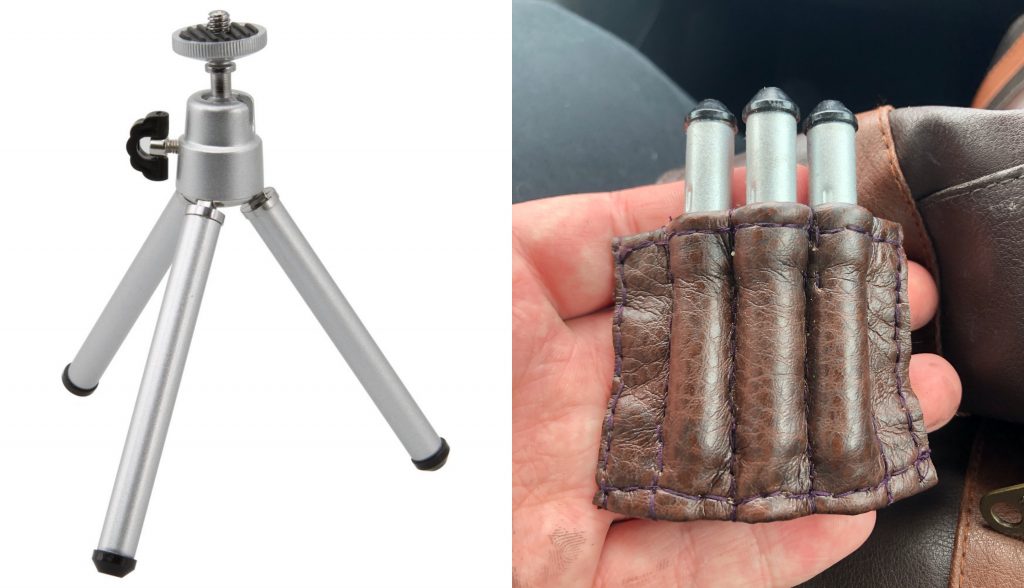
Now, this isn’t terrible. It worked nicely for my cosplay and brought it together in a nice way. BUT, it was time for an upgrade, especially since my work with real leather had greatly improved. I started with a TON of measurements and a lot of thinking. The problems with the last one were these: The bottom of the pocket was sewn in a way that scrunched it up against the tubes making it feel unnatural, the top piece and bottom piece were the same size causing a drastic curve on the back, and the sewing was inconsistent. To fix this problem, I formed the top leather piece over a tube and marked where the stitch line needed to be. I did that three times and left room for a couple side flaps, a carry over from my older build that I liked a lot. Unfortunately, as the tubes were glued into the original pocket, I had to preform some light surgery and remove them from the back, but the results worked out well.
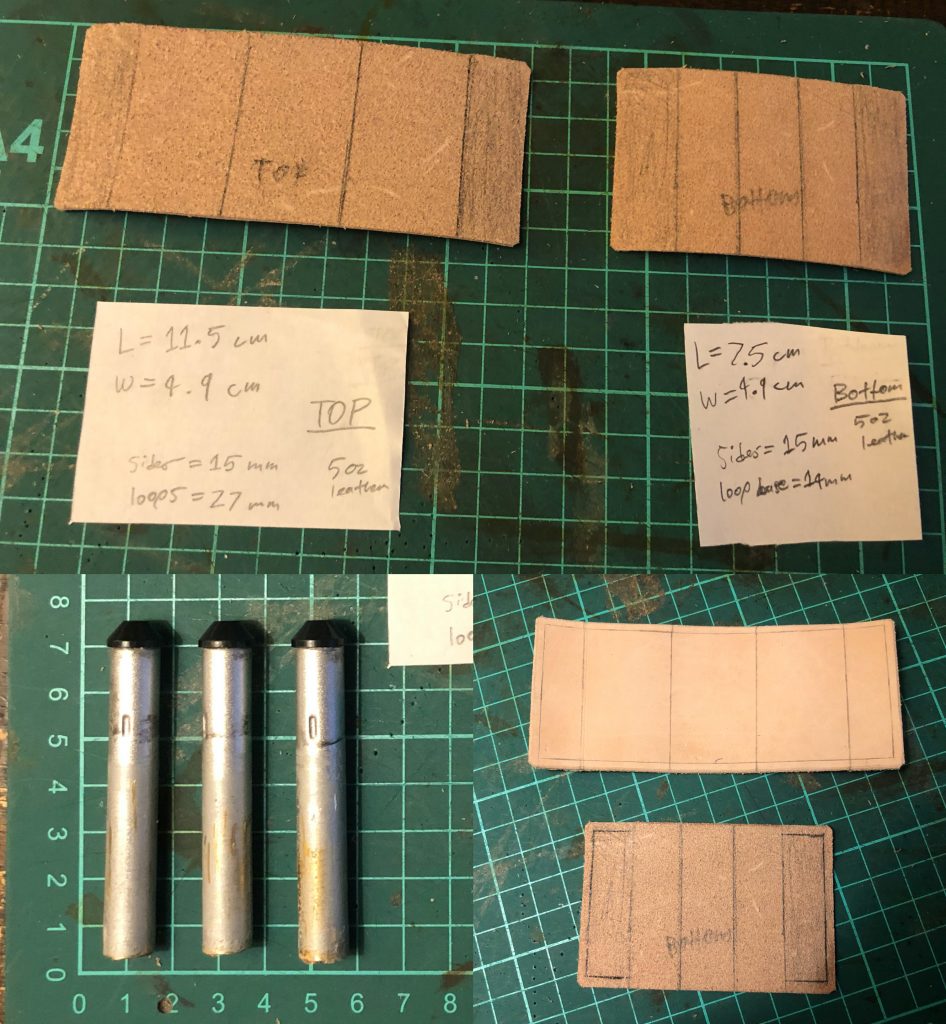
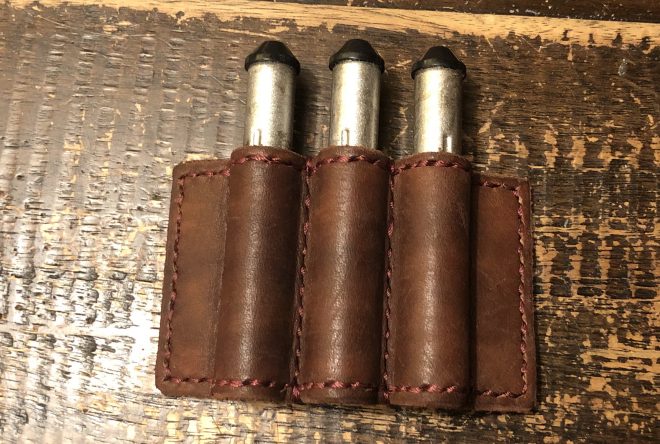
After I cut out the pieces and marked them, I stamped the stitch holes and dyed it. I used the regular dark brown I always do and then stitched it all up with some burgundy nylon thread twice over, then I glued in the tubes with epoxy once again. Then I put a piece of tape over the exposed bottom and traced the holes. I transferred the shape onto some scrap leather and cut them out. Then I dyed them the same dark brown, and epoxy them onto the bottom to fill in the holes. And here are the results:
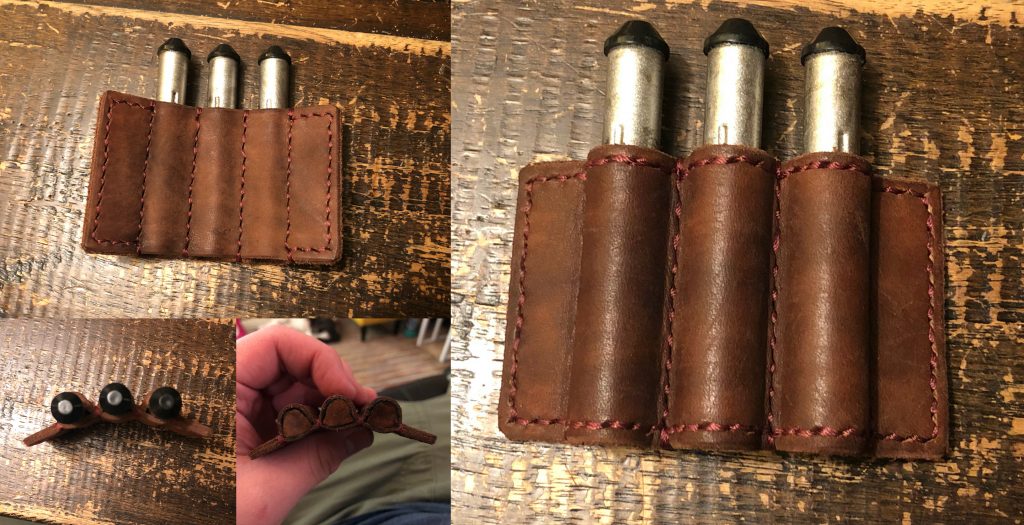
I think this turned out really nice, and it lays PERFECTLY. It’s just the right amount of curve and the tubes are uniform and straight. All that template making and thinking paid off I guess! I’m excited to slap this on the new jacket and see how it all comes together! Thanks for reading and stay tuned!