Like many, after watching the Indiana Jones films as a kid, I wanted a bullwhip. Every summer, my family and my cousins who lived in northern California would make the two hour drive to San Fransisco and walk through China Town with $15 each to spend on whatever we wanted. And I can tell you for sure, every time I would get at least two boxes of those little poppers you throw on the ground, a wood katana, and an Indiana Jones costume whip. And while it was SWEET to own a whip, they didn’t crack, they were cheap as hell, and after a few days they would unravel and get thrown away. Even as a kid, I always wanted EXACTLY what I saw on screen, and now that I’m older and I’ve got the ability to obtain funds for things like this, I wanted to make one for real. I wanted to make a bullwhip.
To start, leather is expensive. Especially premium genuine kangaroo leather, the kind used to make whips for the Indiana Jones films and the kind commonly thought of as the best for whip making. It is the strongest and most flexible leather on the planet, but it does have a few drawbacks. For one, it requires care. leather needs to be treated relatively frequently and also requires specific tools to do so. Leather also doesn’t react well to moisture and rain, not to mention dust and dirt, all of which are possibilities when being used outside. And while I love the classic look of the original whips and have dabbled in leather work a few times before, I wanted to do something a bit simpler. Thats when I discovered the practice of making nylon bullwhips.
The new hot trend in the whip making community is the recent introduction of bullwhips made of gutted 650 paracord. It’s far cheaper than leather, easier to obtain, is essentially waterproof, has military grade strength, and is more than flexible. I saw the final product using these materials and knew I wanted to try my hand at this. I watched numerous videos and did hours of research to write my own procedure on how to make the whip I wanted. If I want going to move away from genuine leather, I didn’t want it to look like an imitation of the real thing, and therefor didn’t want the original Indiana Jones look, but didn’t want to do something too exotic like a bright pink and neon blue. I decided to go with the color scheme of the circus whip seen in the opening of The Last Crusade with River Phoenix, with the iconic form factor of the regular Indy whip. With a full procedure, an idea for color and shape, as well as hours of research, I ordered the materials I needed and began to work.
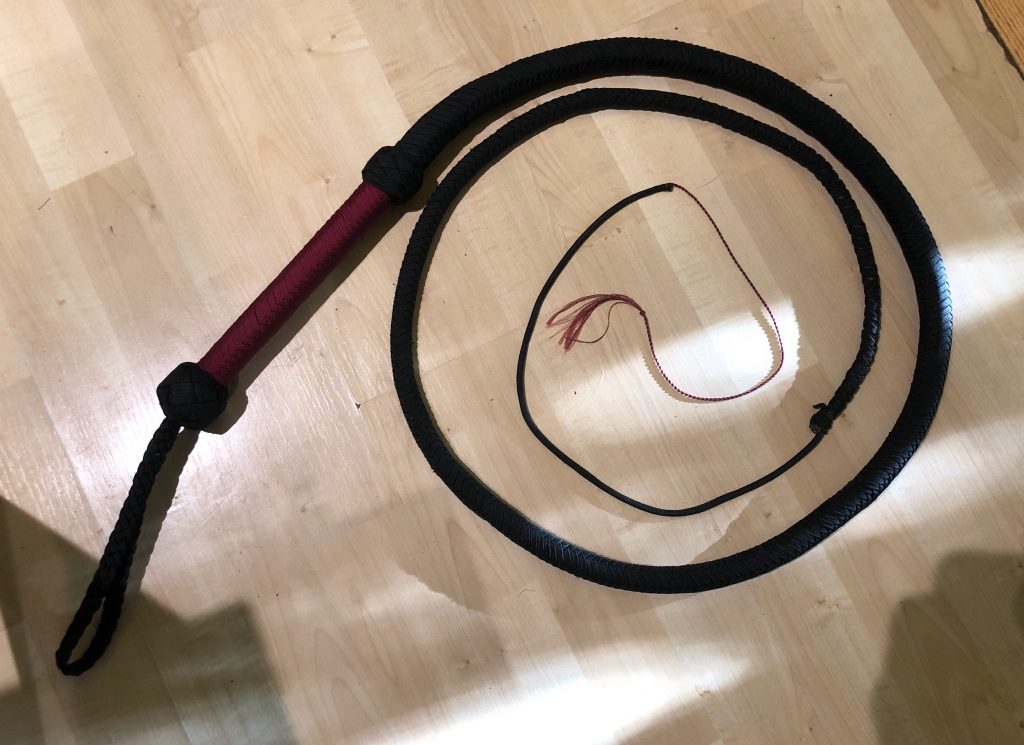
The full procedure can be read below, as well as detailed walkthroughs of things to avoid when doing this yourself, and I recommend you read it if that sounds interesting to you. I’ll touch on the highlights here, but it may be unclear. I’ve also linked the playlist of videos I used to make by whip below just in case. Whips begin with a core consisting of a steel rod for the handle and a length of hollowed cord filled half way with BBs to add weight to the back end, helping it create a smoother transition between the tapers. I’ll talk more about in a second. A bullwhip is typicially constricted in three layers, or bellies, that slowly tapers they move downwards towards the end of the whip. At the end of the braided section of the whip, a piece of cord called the fall runs about two feet in length and is knotted at the end of the main whip body to secure it. And at the very end of the fall is the cracker, a thin tassel like end that has about six inches of twisted length and two inches of loose tassels at the end. This all adds to the taper of the whip and allows it to pick up speed easier, making the whip break the sound barrier causing the loud cracking sound. The first belly has four strands, the second belly has six strands, and the third belly has eight strands, all of the strands at different lengths. This is yet again to encourage the taper of the whip. As the strands start to get to the end of their lengths, you continue to plat (braid) over the shorter strands until you get to the end. The layers are then bound with hockey tape and artificial sinew to add strength and also, you guessed it, to encourage the taper. There and HUNDREDS of details to keep in mind that I only learned after the project was complete and go into with my procedure. The whip can also be made to have a different colored handle like I did, which involved cutting off the last layer of the whip on the handle and re braiding the handle in your desired color. The heel knot and transition knot were built up with wraps of leather and then plated over, and the wrist loop was made of four pieces of gutted cord braided in a four strand pattern and added to the heel knot foundation.
For me, the core was easy, it took a while but it never became impossible. The first and second bellies were the same. But the third belly I had to redo about seven times. To clarify something, when I say the third belly is eight strands, I don’t mean it is 8 strands that your plating. They are folded in the center around the base of the handle, creating a total of 16 individual strands to manage. It was a nightmare. I had a very well done whip with a decent foundation and I was a few steps away from the end, but it just couldn’t happen. I was originally planning on expediting the handle by doing a checkerboard pattern which is said that it is an easier pattern to manage. But I disagree completely. The easiest pattern is the one used to make the main body of the whip, which is literally just taking the top stand of the opposite side, finding the middle of the strands, (eight strands above, eight strands under) and doing that again on the opposite side. it looks good, it’s a simple pattern, and it makes managing sixteen strands easy. so that’s what I did for the maroon handle as well, and I like it a lot, even if it wasn’t my original plan. The more and more I look at the checkerboard pattern handle, the more and more I find that it doesn’t suit the whip I made, and I’m glad I ended up using the standard pattern for my handle. For the transition knot and the heel knot, it took multiple tries as well, but after you get the first part done, it becomes a piece of cake. The heel knot was a bit too loose for my liking and showed the untreated leather I had used to build it up, and so I added another layer to it to widen the knot. this also made the knot choke up on the wrist loop which hid the seam on that and wile it is unconventional, I liked the look.
After that, people often recommend you wax the whip with paraffin wax, helping it to bonding the layers together, add some more weight, and making for a more effective seal against water, but in my opinion, it ruined the look of the whip. The black and maroon color scheme was extremely striking and clean before waxing, and while it made the handle a deeper color and added some aged looking aspects to the thing, it absolutely didn’t work on the black. Numerous spots of white were all over the small gaps and didn’t fall off even after whipping the thing numerous times, which I thought would surly help. Overall despite the advantages, I don’t plan on using this thing every day, and I liked the look of it before waxing, which is highly unfortunate, but doesn’t ruin the INCREDIBLE sound. This thing can crack. I’ve only learned a few moves with it, but the range from a nice crisp crack to an ear shattering boom that echos for a mile, it is extremely fun to mess around with. Because of the current COVID-19 pandemic I haven’t been able to mess around with it with friends, but I can imagine the fun I could have teaching people to use it.